
Flying Sub |
| By Ismael Davila |
|
|
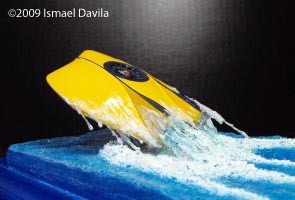
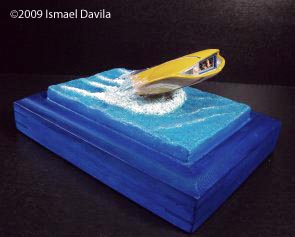
This is the 1/128th Flying Sub from Moebius. I wanted to capture a scene depicting the sub as it comes out of the ocean. You will need to have your model completed with interior done and the plastic tubes on the rear before you get started on the base. If you decide on lighting the inside you will make sure the wires comes out the tube. The tubes need to be the diameter of the inner size of the engines, then mounted on the base. The base consists of a 5X7 shadow box, foam board, paper clay, two round plastic tubes the diameter of the inner rim of the exhaust engines. This will mount the model to the base and allow wiring through the tubes for lighting of the interior. The foam board is only 1/2 inch thick. Glue it down onto the shadow box, then get your paper clay and cover all the foam. Don’t forget the edges. While gently pressing the clay into the foam, wet your fingers and form in some waves. Don’t forget to allow two holes for the tubes. Once the clay is dry you can start painting the water effects. When you are satisfied with your ocean, let dry. Now give the base a thick coat of Liqitex gloss gel. Dab the surface with the paint brush. When dry this will give it an allusion of depth. Drybrush surface with gloss white. Finish with another thinner layer of Liqitex gel. Mount the sub into place. |
|
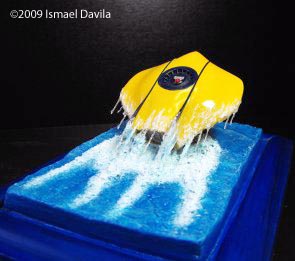
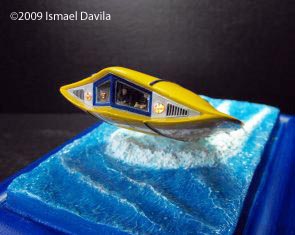
The water coming off the wings was done using spare clear sprue from the kit, heated and stretched then glued to the edges of the wings giving the appearance as just coming out of the water. Woodland Scenic's " Water Effect" was applied from the wings and onto the stretched clear rods. The sub was given a coat of future floor finish giving the wet look! A mixture of small glass clear beads, gloss white paint and liquitex gel was applied to the rods. This helps hide the rods and onward to form in the wake. Don’t forget to get a good amount of this mixture around the front. Let this dry and dry brush a good coat of white gloss paint to give it that froth effect. The batteries are placed under- inside the shadow box with a switch. The final appearance seems to be a still shot. I really enjoyed doing this kit and its size is a perfect addition in my display cabinet. |
|
